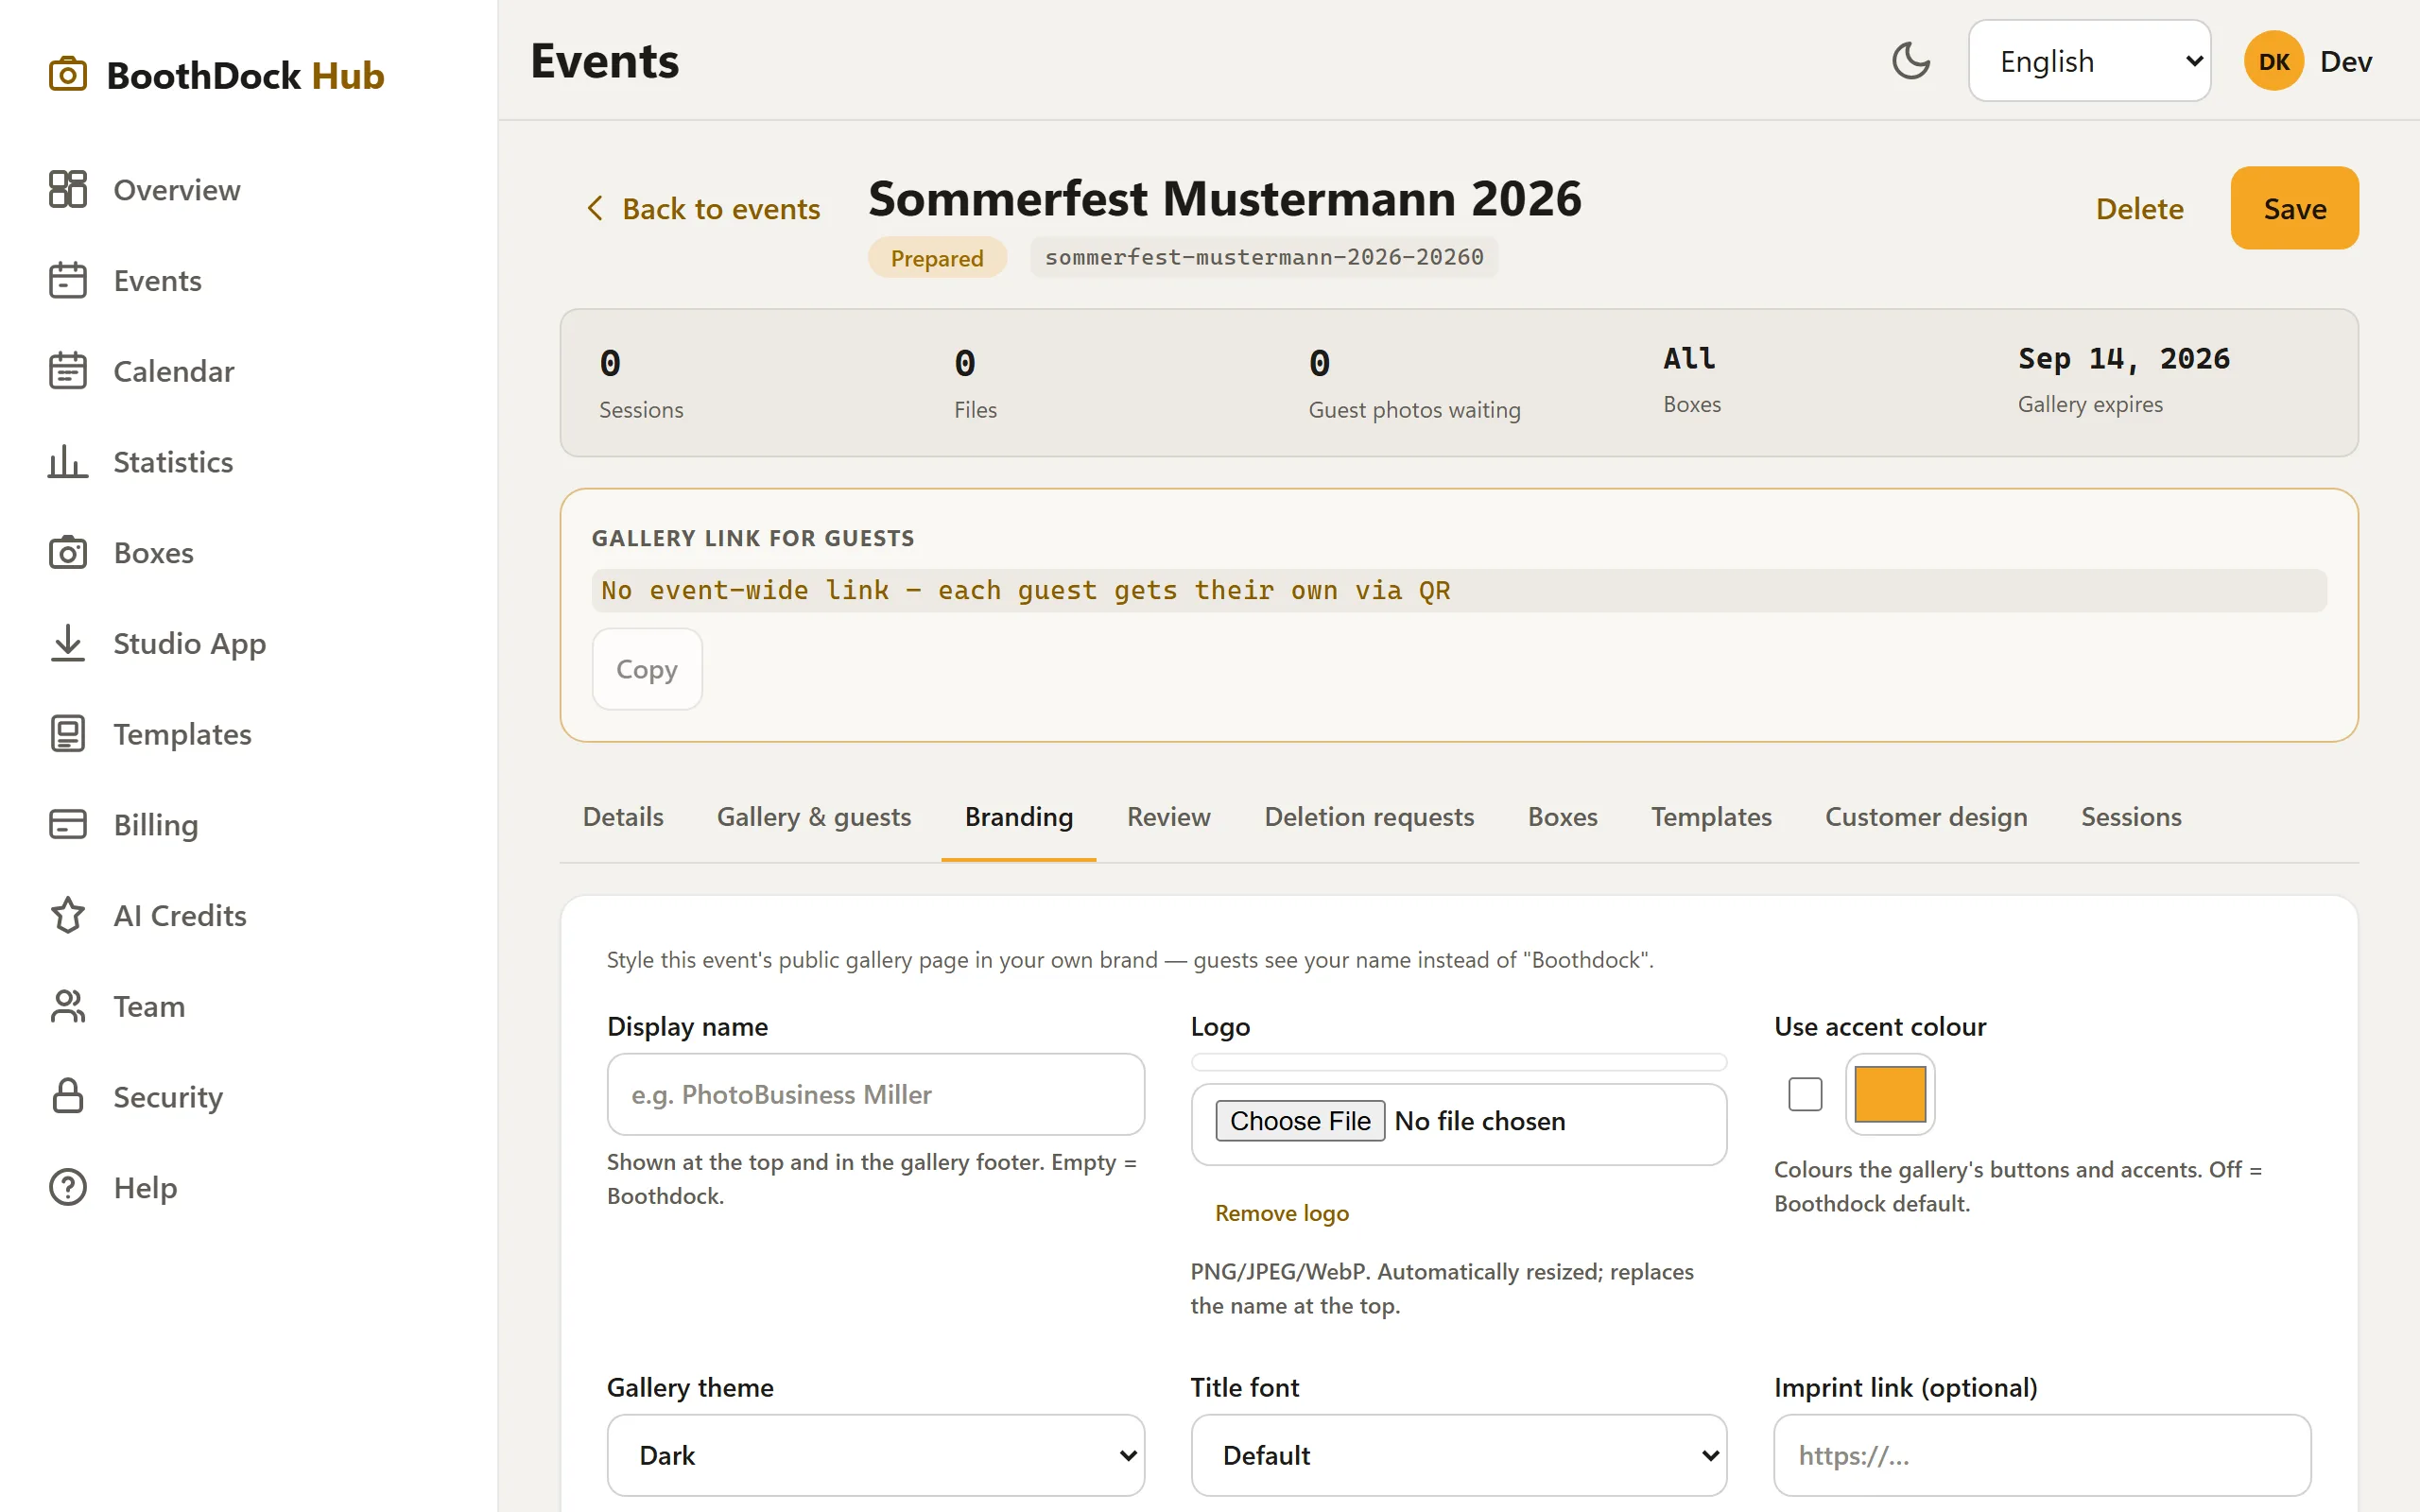
The public gallery page that your guests open via QR code is your most visible brand touchpoint. In the Hub you can style it per event in your own look – guests then see your name instead of "BoothDock".
Where to find it
- In the Hub, open the Events section and select your event.
- Click the Brand tab.
- Make your settings and click Save in the top right.
The changes take effect immediately on this event's gallery page.
What you can customize
| Setting | Effect |
|---|---|
| Display name | Appears at the top and in the footer of the gallery. Empty = BoothDock. |
| Logo | PNG, JPEG or WebP. Automatically scaled down and replaces the name at the top. |
| Accent color | Colors the buttons and accents of the gallery. Off = BoothDock default. |
| Theme | Light or dark appearance of the gallery page. |
| Title font | Font for the event title (e.g. an elegant script for weddings). |
| Custom links | Appear in the footer (e.g. your website, Instagram). |
| Imprint / privacy policy | Your own legal links; empty = BoothDock's. |
Good to know
- A subtle "powered by BoothDock" note remains in the footer.
- The branding appears only on the published gallery page – never on the "invalid link" page. That way a logo never reveals that an album exists for a link at all.
- The logo should ideally be a transparent PNG so it fits cleanly into both light and dark themes.
- If a setting is missing (e.g. no custom imprint), the gallery automatically falls back to the BoothDock default – so there's never a gap.