With the booking module, your customers send requests online: they choose a package, a date and extras and send their contact details. The request lands in the Hub under Bookings, you get an e-mail and turn it into a quote – or accept it directly. The booking module is a paid extra – prices and access are explained below under “Access and prices”.
Access and prices
The booking module is available in two ways:
| Option | Paid yearly | Paid monthly |
|---|---|---|
| Add-on to Pro | €12 a month (€144 a year) | €15 a month |
| “Booking only” – without Pro | €19 a month (€228 a year) | €24 a month |
All prices are final prices. Existing Pro accounts get the booking module free for 3 months, until 28 January 2027. The free period simply ends; nothing renews automatically. If you book during the free period, billing only starts after it.
You book it in the Hub under Bookings with Book yearly or Book monthly – anyone who manages the workspace can do this. Under Account → Plan & billing, the Booking module card shows what is booked and when it renews; there you cancel with Cancel at the end of the paid period.
When access ends, your booking page goes offline and no new requests or quotes are created. Bookings already in progress run to completion, including payments, final invoice and dunning notices. Requests, documents and the export remain available to view. If your Pro subscription ends, we switch the add-on to “Booking only” at its next renewal – you get an e-mail beforehand.
The “Bookings” area
In the Hub under Bookings you find five tabs:
| Tab | What for |
|---|---|
| Bookings | New and completed requests with quote, documents and payments; filters All, My bookings and My appointments |
| Customers | Your customers with notes and follow-ups |
| Invoices | All invoices with status, monthly totals and reminders; Write invoice without a booking |
| Offering | Packages & extras (what customers can choose on the booking page) and Inventory (boxes, equipment, consumables) |
| Settings | Collapsible sections: Booking page & widget, Company & tax, Payment & Stripe, Contract, Staff & permissions, Documents & export |
At the top you see whether your booking page is Online or Off. As long as something important is missing (page off, company details incomplete, no package), a note shows “… steps left until your first booking” – clicking a step opens the right place.
1. Add packages and extras
Under Offering → Packages & extras, use Add to create at least one package, for example “Wedding · 6 hours”. Extras are optional, such as a guest book album or a backdrop.
| Field | Meaning |
|---|---|
| Name and Description | This is how the entry appears on the booking page. |
| Price (€) | Price in your currency (see Country, currency and taxes). |
| Duration (hours) and Event type | Packages only. The event created on acceptance takes over the event type. |
| Days booked, Maximum hours and Maximum days | Packages only: multi-day packages and a duration the customer chooses – see Packages: duration, special price, deposit and travel costs. |
| Security deposit (refundable, not in the price) and Special offer | A deposit next to the price and a special price for the first requests – also explained there. |
| Order | A smaller number appears higher up. |
| Uses | Which boxes and equipment a booking blocks – see Inventory. |
| Photos | Up to 6 photos (JPEG, PNG or WebP up to 10 MB). The first photo is the cover image. You add photos after the first Save. |
| Show on the booking page | Without the tick, the entry stays saved but is Hidden. |
| Translations | Optional: name and description in other languages. If a language is missing, the customer sees your default text. |
2. Settings
Under Settings → Booking page & widget you decide what your booking page looks like and who may use it (rarely used fields such as translations, terms link or allowed widget pages are under Advanced):
| Setting | Meaning |
|---|---|
| Booking page online | While it is off, nobody can reach the page. |
| Address | Lowercase letters, digits and hyphens – appears in the address of your booking page. |
| Heading and Introduction | Texts at the top of the page, also in other languages via Translations. |
| Lead time (days) | Requests must be made at least this many days in advance. |
| Bookable up to (months) | How far into the future the calendar reaches. |
| Send notifications to | Where the e-mail about new requests goes. Empty = your account's e-mail. This address is also the reply address for your customers (see below). |
| Address is required on the booking page (e.g. for the contract) | Without the tick, street, postcode and town are optional on the booking page; with the tick they are required. The address fills the placeholder {adresse} in the contract. |
| Phone number is required on the booking page | Without the tick the phone number is optional; with the tick the request can only be sent with a phone number. |
| Note below the packages | A short text below the package cards, e.g. the footnote for an in a description: “ Delivery up to 15 km included”. bold and __underlined__ work, also in other languages via Translations. Empty = no note. |
| Custom fields | Additional details your customers give on the booking page, such as contact person on site, occasion or “Parking available” – see “Custom fields” below. |
| Blocked periods | For example holidays: with + Block a period you enter From, To and a Note (optional, only for you). These days cannot be selected on your booking page. |
| Note below the price | Small business (no VAT charged), Prices include VAT, Prices exclude VAT or No note. |
| Your terms and conditions (link) and Your privacy policy (link) | You are responsible for your customers' requests – link your own texts. |
| Widget allowed on | One address per line, e.g. https://www.meine-fotobox.de. Empty = on any https page. |
Save applies your changes.
Custom fields
Under Custom fields you ask on the booking page for whatever else you need. With Add field you create a field, at most 12 fields:
| Field | Meaning |
|---|---|
| Label | How the field appears on the booking page, e.g. “Contact person on site”. |
| Type | Text (free input up to 300 characters), Choice (the customer picks from a list) or Checkbox (yes/no). |
| Choices (one per line) | Only for Choice: one option per line, e.g. wedding, birthday, company party. |
| Required | With the tick, the request can only be sent once the field is filled in. |
| Key for the contract | Suggested from the label, e.g. ansprechpartner_vor_ort. Allowed are lowercase letters a–z, digits and underscore, at most 24 characters. In the contract, {feld:ansprechpartner_vor_ort} inserts the answer. |
| Translations | Optional: label and choices in further languages. If a language is missing, the customer sees your default text. |
Remove field deletes a field. Your customers fill in the fields in the Contact step. You see the answers in the request under Customer & date – a checkbox appears there as ✓ or –. Custom fields also work without a contract. How to use them in the contract is described under Quotes, invoices and documents. If you change a key later, adjust the placeholder in the contract text as well.
Welcome page
With the tick Welcome page before choosing a package, your booking page starts with a welcome instead of going straight to the packages: your logo at the top, the Heading in large type below it, then your company description, and at the bottom a button that leads to the packages.
- Without a heading, your company name appears. Without your own Button label, the button says “Choose a package” in the visitor's language.
- Separate paragraphs in the company description with an empty line.
- The logo comes from your billing details under Company & tax. Without a logo, only the heading appears.
- You translate the heading, text and button per language like the other texts of the page.
For more design options there is the page builder: as soon as the start page has blocks there, they replace this simple start page.
Page builder
Under Page builder you put your booking page together from fixed blocks. Every block adapts to mobile and uses your accent colour. There are three areas:
- Start page (before the packages) – if there is no button to the packages, the page adds one itself. If you have already set up the simple start page, you bring it over as blocks with Take over simple start page.
- Above the packages
- Below the packages
With Add block … you choose a type, at most 20 blocks per area:
| Block | Content |
|---|---|
| Heading | Empty = your company name. With Show logo above it (from your billing details) your logo appears above it. |
| Text | Separate paragraphs with an empty line. |
| Image | Upload image (JPEG, PNG or WebP up to 10 MB) or pick one of your package photos, plus a Caption (optional). Delete own image removes an uploaded image immediately. |
| Checklist | One item per line. |
| Button | Label (empty = default text) and Target: To the packages (start booking), Open contact section (only appears when the contact section is switched on) or Other page (opens in a new tab) with an https address. |
| Note (small) | A small text, such as a footnote. |
| Contact | Shows company name, town, phone and e-mail from your billing details, with your own heading if you like. |
Sample images: No photos of your own yet? Wherever you choose an image (Image, Image carousel, Image gallery, Columns and the design's title photo), there is a Sample images tab next to Own images: 24 ready-made mood images for weddings, birthdays, company parties and party & prom, six each to match the designs. Filter with Occasion, one click picks the image. You can replace it with your own photo at any time.
bold and __underlined__ work in the texts. Every block has the tick Visible, arrows to move it and ✕ to remove it, plus Translations for further languages. Save applies everything. More blocks and designs will follow.
Contact section
With the tick Contact section on the booking page, your booking page gets a Contact button at the top right. Visitors can use it to write to you without requesting a date: last name, first name, e-mail, phone, address, subject and message.
- The e-mail is always required, plus a subject or a message. Under Required fields (the e-mail is always required): you make further fields required.
- With Your own heading and Your own introduction you replace the default texts of the contact section, per language via Translations. Empty = default text in the visitor's language.
- Every message goes to your notification e-mail. If you reply, the reply goes straight to the sender.
- The sender then appears in your customer list, with the message as a note on their customer card. If someone writes again with the same e-mail, another note is added.
Customise booking page labels
You can change every text of your booking page yourself, per language, for example “Guests (approx.)” to “Number of guests (approx.)”. To do so, open the section Customise booking page labels at the bottom under Booking page & widget:
- Choose the language, for example FR.
- Every text of the page is listed with its default text. Search text finds it quickly.
- Enter your own text, at most 300 characters. Leave empty = default text.
- Save applies the changes.
The labels apply to your booking page only. If the default text contains a placeholder in curly brackets, such as {operator}, keep it in your text, otherwise the value is missing.
Reply address for your customers
If a customer replies to an e-mail about their booking, the reply reaches you. The customer portal shows the same address under “Questions? Write to …”. BoothDock uses:
- the address under Send notifications to,
- if that is empty, the e-mail under Company & tax,
- if that is empty too, your account's login e-mail.
Your name in the e-mails and in the customer portal is the company from Company & tax.
3. Consent when switching on for the first time
When you put the booking page online for the first time, you confirm the terms for the booking module once (link Read the terms). The key point: you are your customers' contractual partner and the issuer of the invoices. BoothDock provides the software and creates quotes and invoices in your name. The Hub stores when you agreed; after that the checkbox no longer appears.
4. Embed the booking page and widget
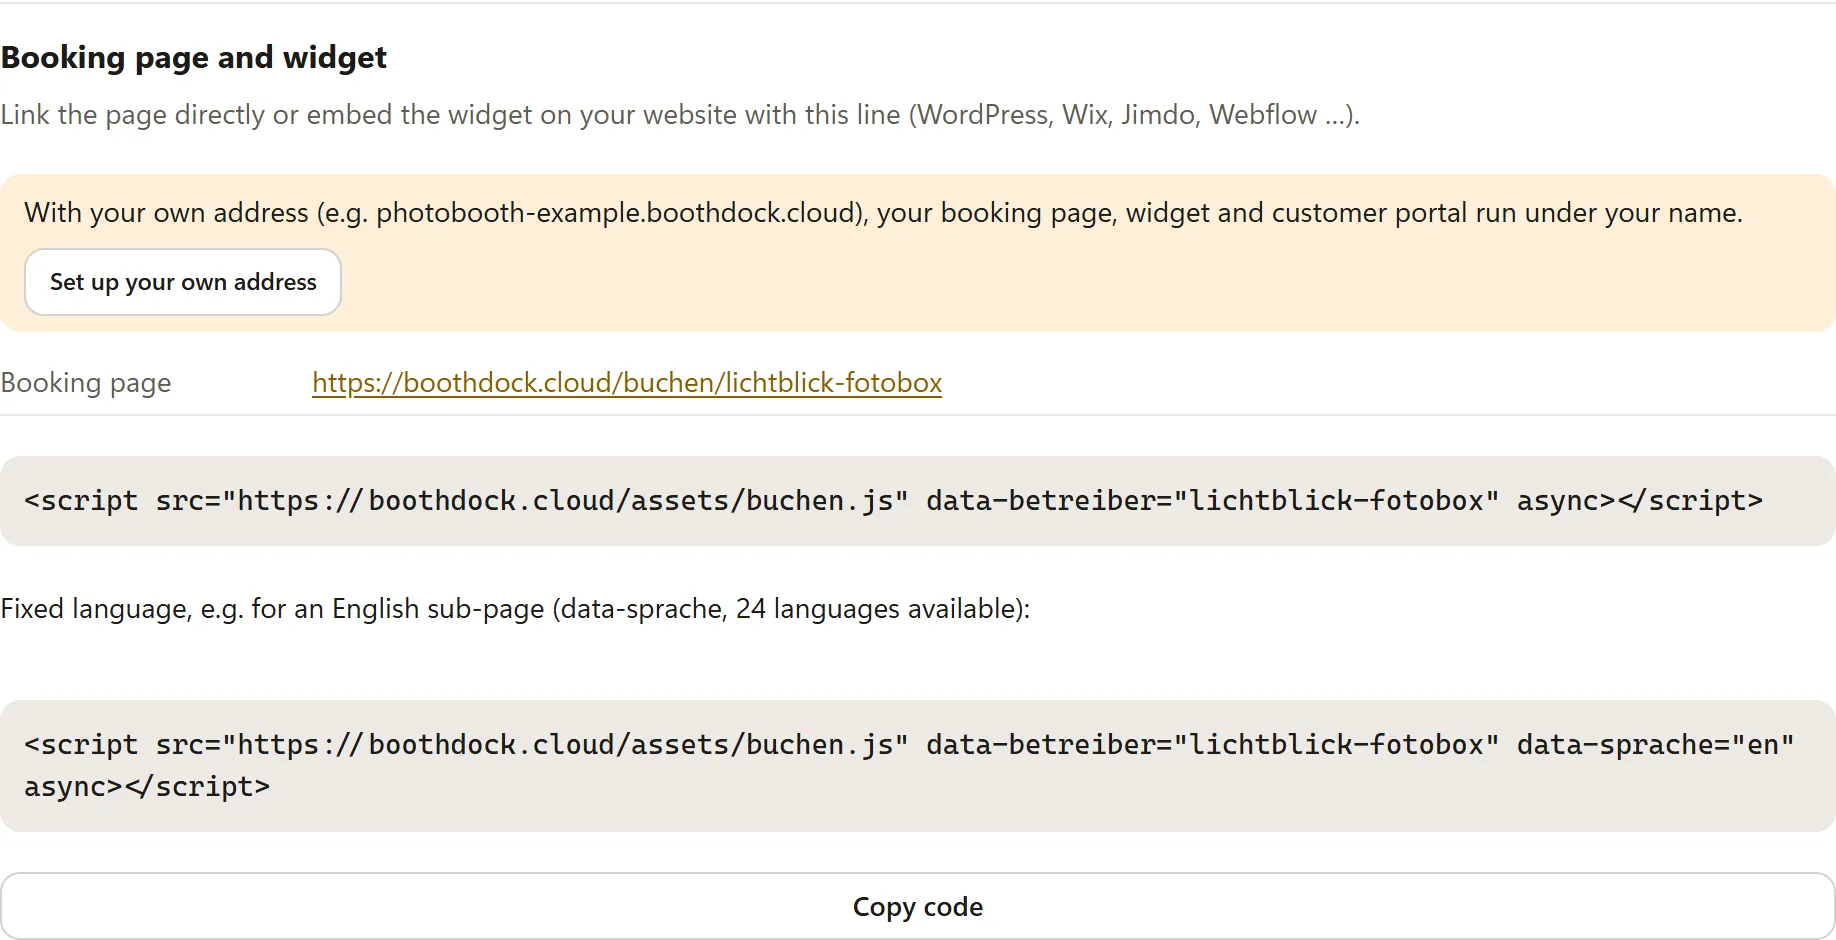
Below the settings you find the Booking page and widget card. You have two options:
- Link: Link to the booking page directly, for example from your Instagram profile or an e-mail.
- Widget: Copy the code with Copy code and paste it on your website where the form should appear (WordPress, Wix, Jimdo, Webflow …). The widget adjusts its height automatically and sets no cookies.
With Your own gallery address – your galleries under your name, the booking page, widget and customer portal run under your name, for example https://fotobox-muster.boothdock.cloud/buchen. It then becomes your main address: the Hub shows it at the top and under On your address, and the widget code uses it. Without your own address, the page is at https://boothdock.cloud/buchen/<deine-adresse>, the code names you via data-betreiber, and the card offers Set up your own address.
The widget shows the visitor's language. For a fixed language – say on an English subpage – add data-sprache="en"; 24 languages are available.
Link preview when sharing
If you share the link of your booking page on WhatsApp, Facebook, Instagram or by e-mail, the preview shows your details: your Heading as the title (otherwise your company name), your company name, your Introduction as the text (without an introduction, the names of your first packages) and the first package photo as the image. So maintain a heading, an introduction and a cover photo in the first package. Some messengers remember a preview for a while – a change then only appears there later.
What your customer sees
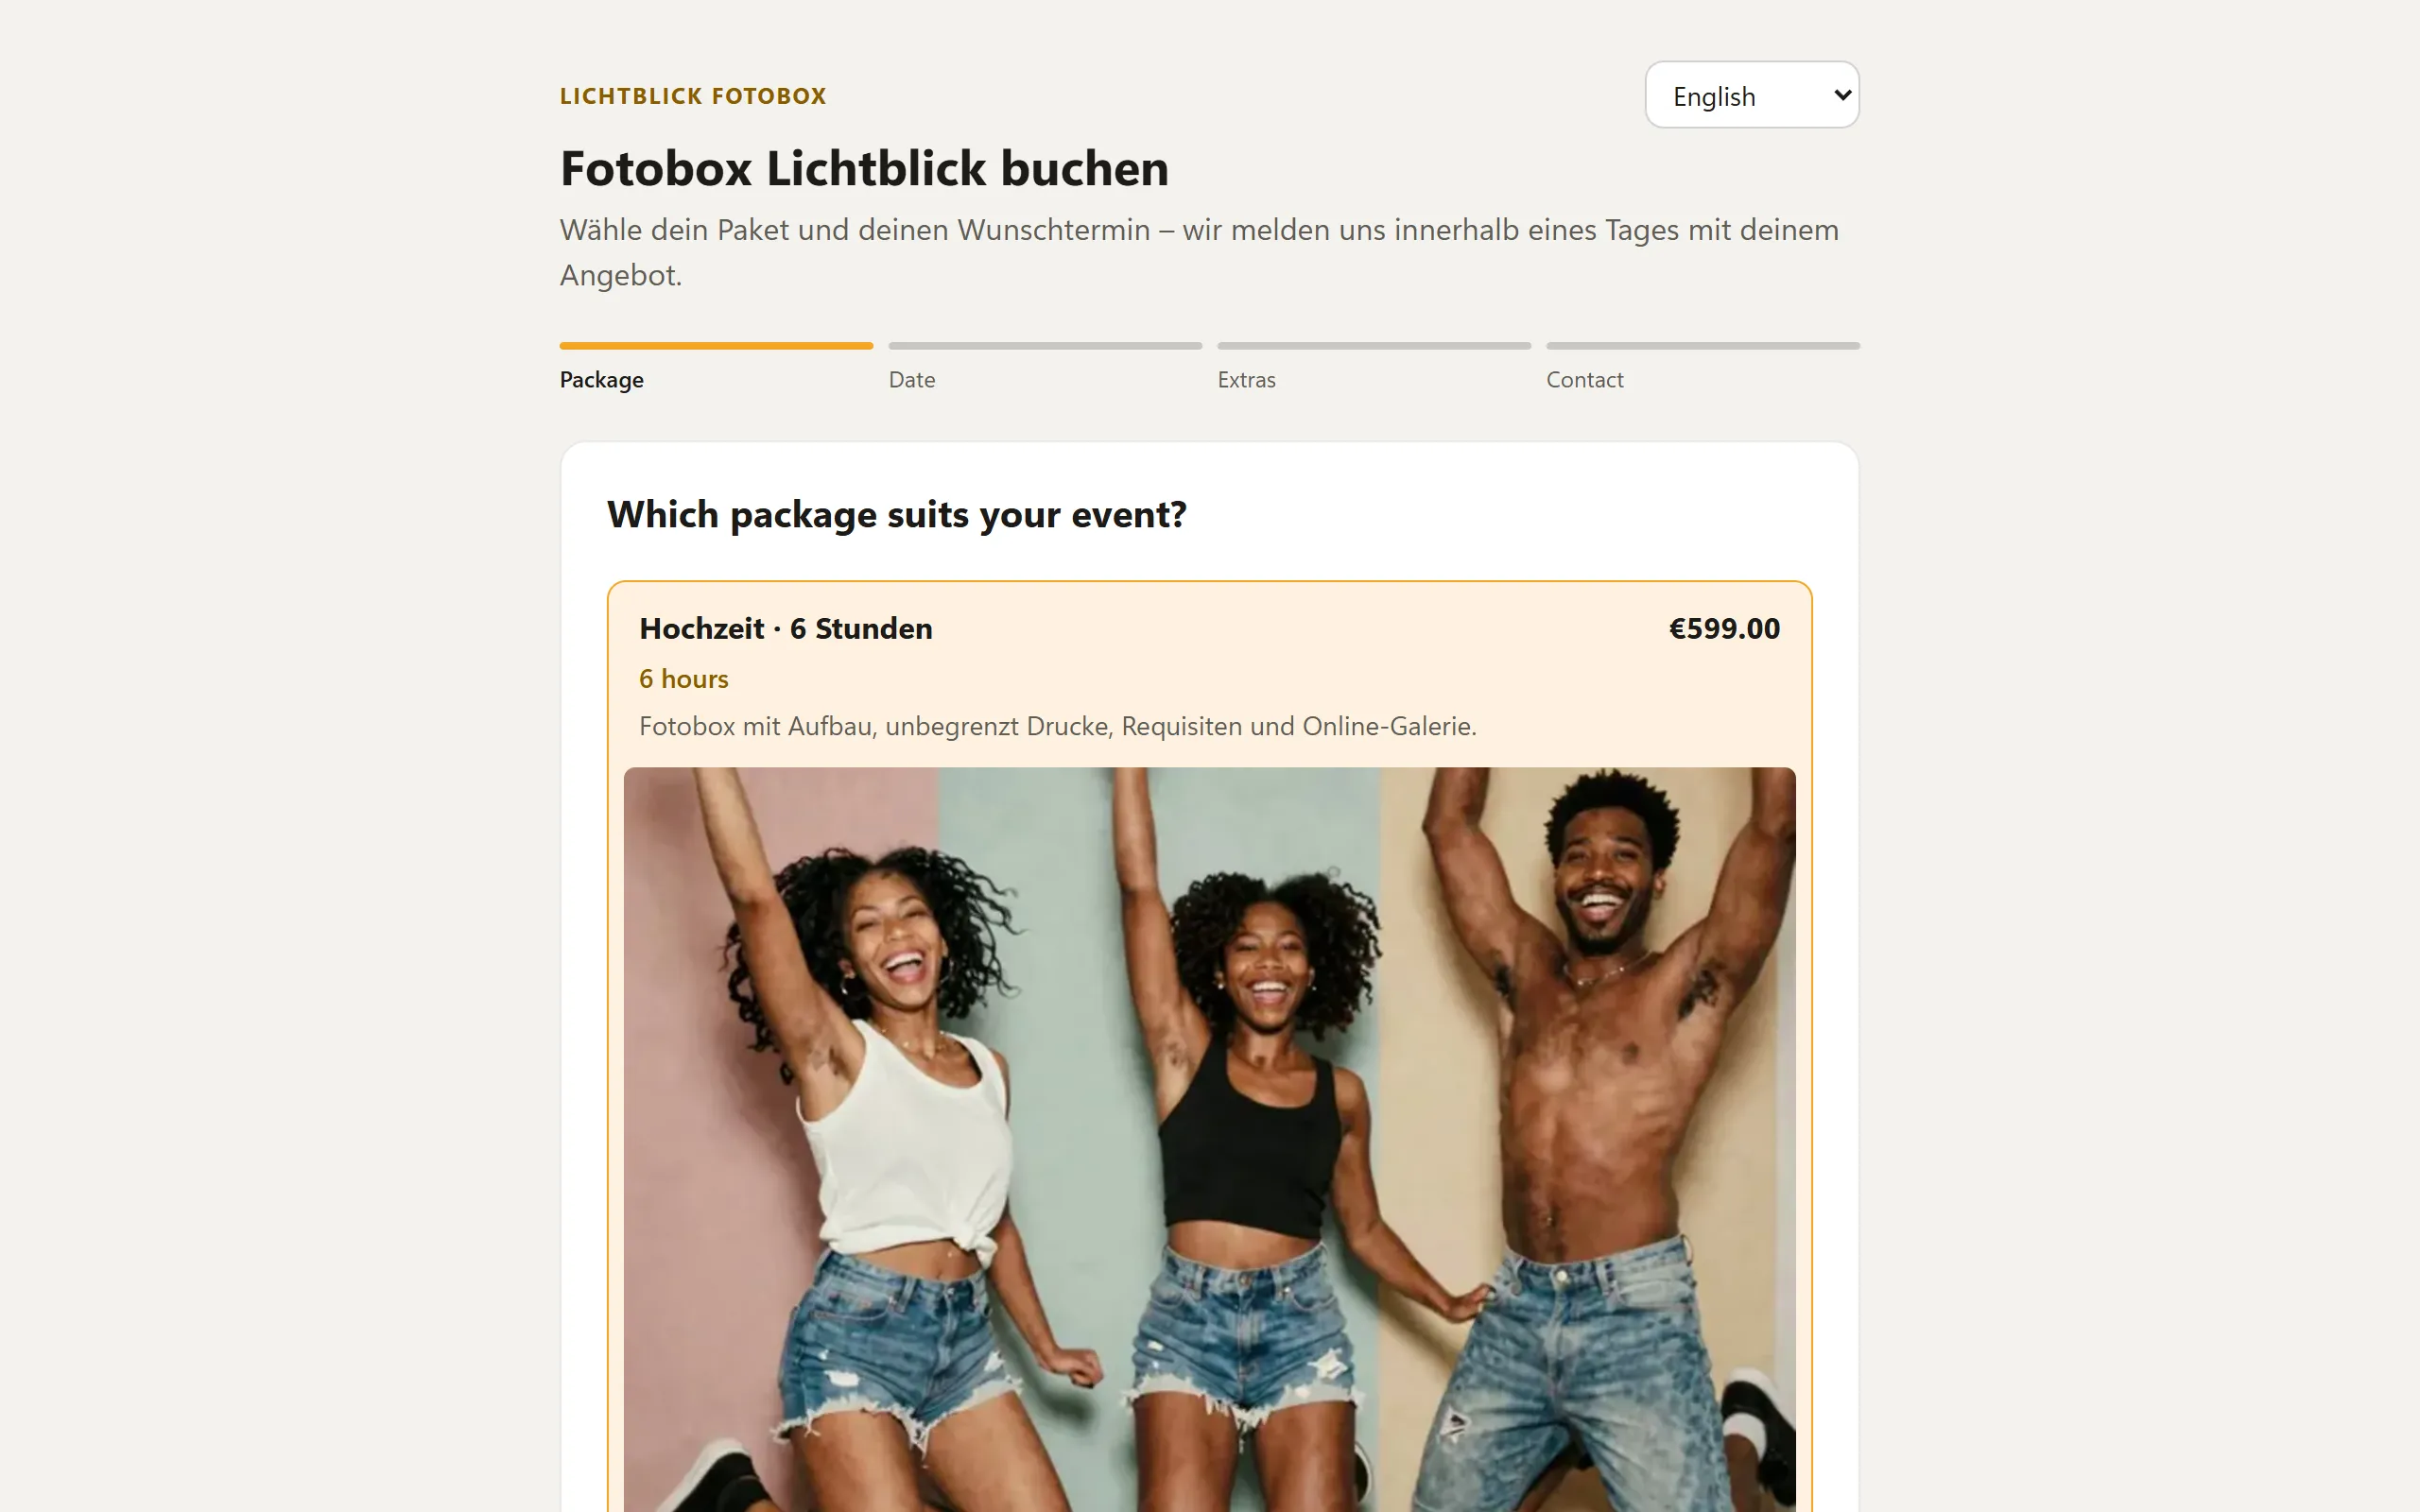
The booking page leads to the request in four steps: Package, Date, Extras and Contact. In the calendar, days are available, almost booked or booked; blocked periods cannot be selected. Depending on the package, the customer also chooses the Duration or the Number of days in the Date step and, if they like, estimates the travel costs there (see Packages: duration, special price, deposit and travel costs). In the Contact step they choose Private individual or Business under I am booking as and enter their address – optional or required. Below that are your own fields; required fields are marked with *. If your contract asks its own questions, they appear there under Details for the contract. The summary shows a security deposit and your travel cost rule next to the total. Name, e-mail and consent to storage are required; below them are your terms and conditions and your privacy policy. With Send request the request goes to you, and the customer gets a confirmation by e-mail.
The price on the page is for display. The server calculates the binding price from your catalogue.
Handling requests
New requests appear in the Bookings tab with the status New. Open shows the request with contact, date, location, number of guests and message. From there you:
- create a quote – see Quotes, invoices and documents, or
- open Accept or decline without a quote: Accept and create event creates the event directly and informs the customer, Decline sends them a rejection. A Message to the customer (optional) is sent along in both cases.
The Hub deletes declined requests after 180 days. Accepted ones stay in your account as business records.
Withdraw a quote, cancel or delete a booking
At the bottom of the request you find one of these areas, depending on its stage:
| Area | When | What happens |
|---|---|---|
| Withdraw quote | Quote sent, not yet accepted | The request is declined; the customer gets a message and can no longer accept or pay. |
| Cancel booking | Booking accepted | The booking is kept with all documents and marked Cancelled. The date becomes free again, open online payments are closed and instalments are no longer collected. |
| Delete booking | Test booking or request at any stage, as long as there is no invoice with a number and no payment received | The booking disappears for good with quotes, contracts and payment attempts. |
Cancelling: With the tick Inform the customer by e-mail (with your note) your customer gets an e-mail that includes your note. Issued invoices remain. Afterwards you cancel them one by one under Documents with Cancel (cancellation invoice); the Hub reminds you. You refund money already paid in your Stripe dashboard or by bank transfer.
Deleting is meant for test bookings and only works as long as there is no numbered invoice and no payment received. Otherwise, cancel the booking. Only managers of the workspace can delete. The customer card remains.
In both cases the Hub also removes the event that was created when the booking was accepted, as long as it contains no photos yet. Otherwise the day would stay blocked in the calendar. If the event already contains photos, it remains, and you delete it under Events if needed.
Working with staff
If other people belong to your Team, they work along in the Bookings area:
- Responsible: in the request you assign one or more people. They get an e-mail with customer, date and location.
- My bookings shows everyone the requests they are responsible for; My appointments the accepted bookings from today on.
- Under Settings → Staff & permissions you decide what staff may do besides viewing, e.g. Create and send quotes, accept or decline requests or Record payments manually. Settings, billing details, Stripe and the export remain reserved for you and the administrators.
Template choice for your customers
Your customers can pick their print template themselves. Under Bookings → Settings → Template choice:
- Switch on Template choice in the customer portal.
- Under Released templates, tick the templates the customer may choose from (up to 24) and pick the mode.
- If you like, switch on Also put the link into the confirmation email.
- Save.
When a booking is accepted, a customer design link is created automatically in the new event. The customer portal shows the step Choose your template with the status of the choice. The choice lands in the event's Customer design tab; after your approval it goes to the box. Bookings you accepted before switching on get the step as well.
With Template showcase, the released templates are public at /buchen/<your-name>/vorlagen (with your own address at /buchen/vorlagen) – for browsing before booking. After saving, the area shows the snippet for embedding it on your website. You can change every customer-facing text per language under Booking page & widget → Customise booking page labels.