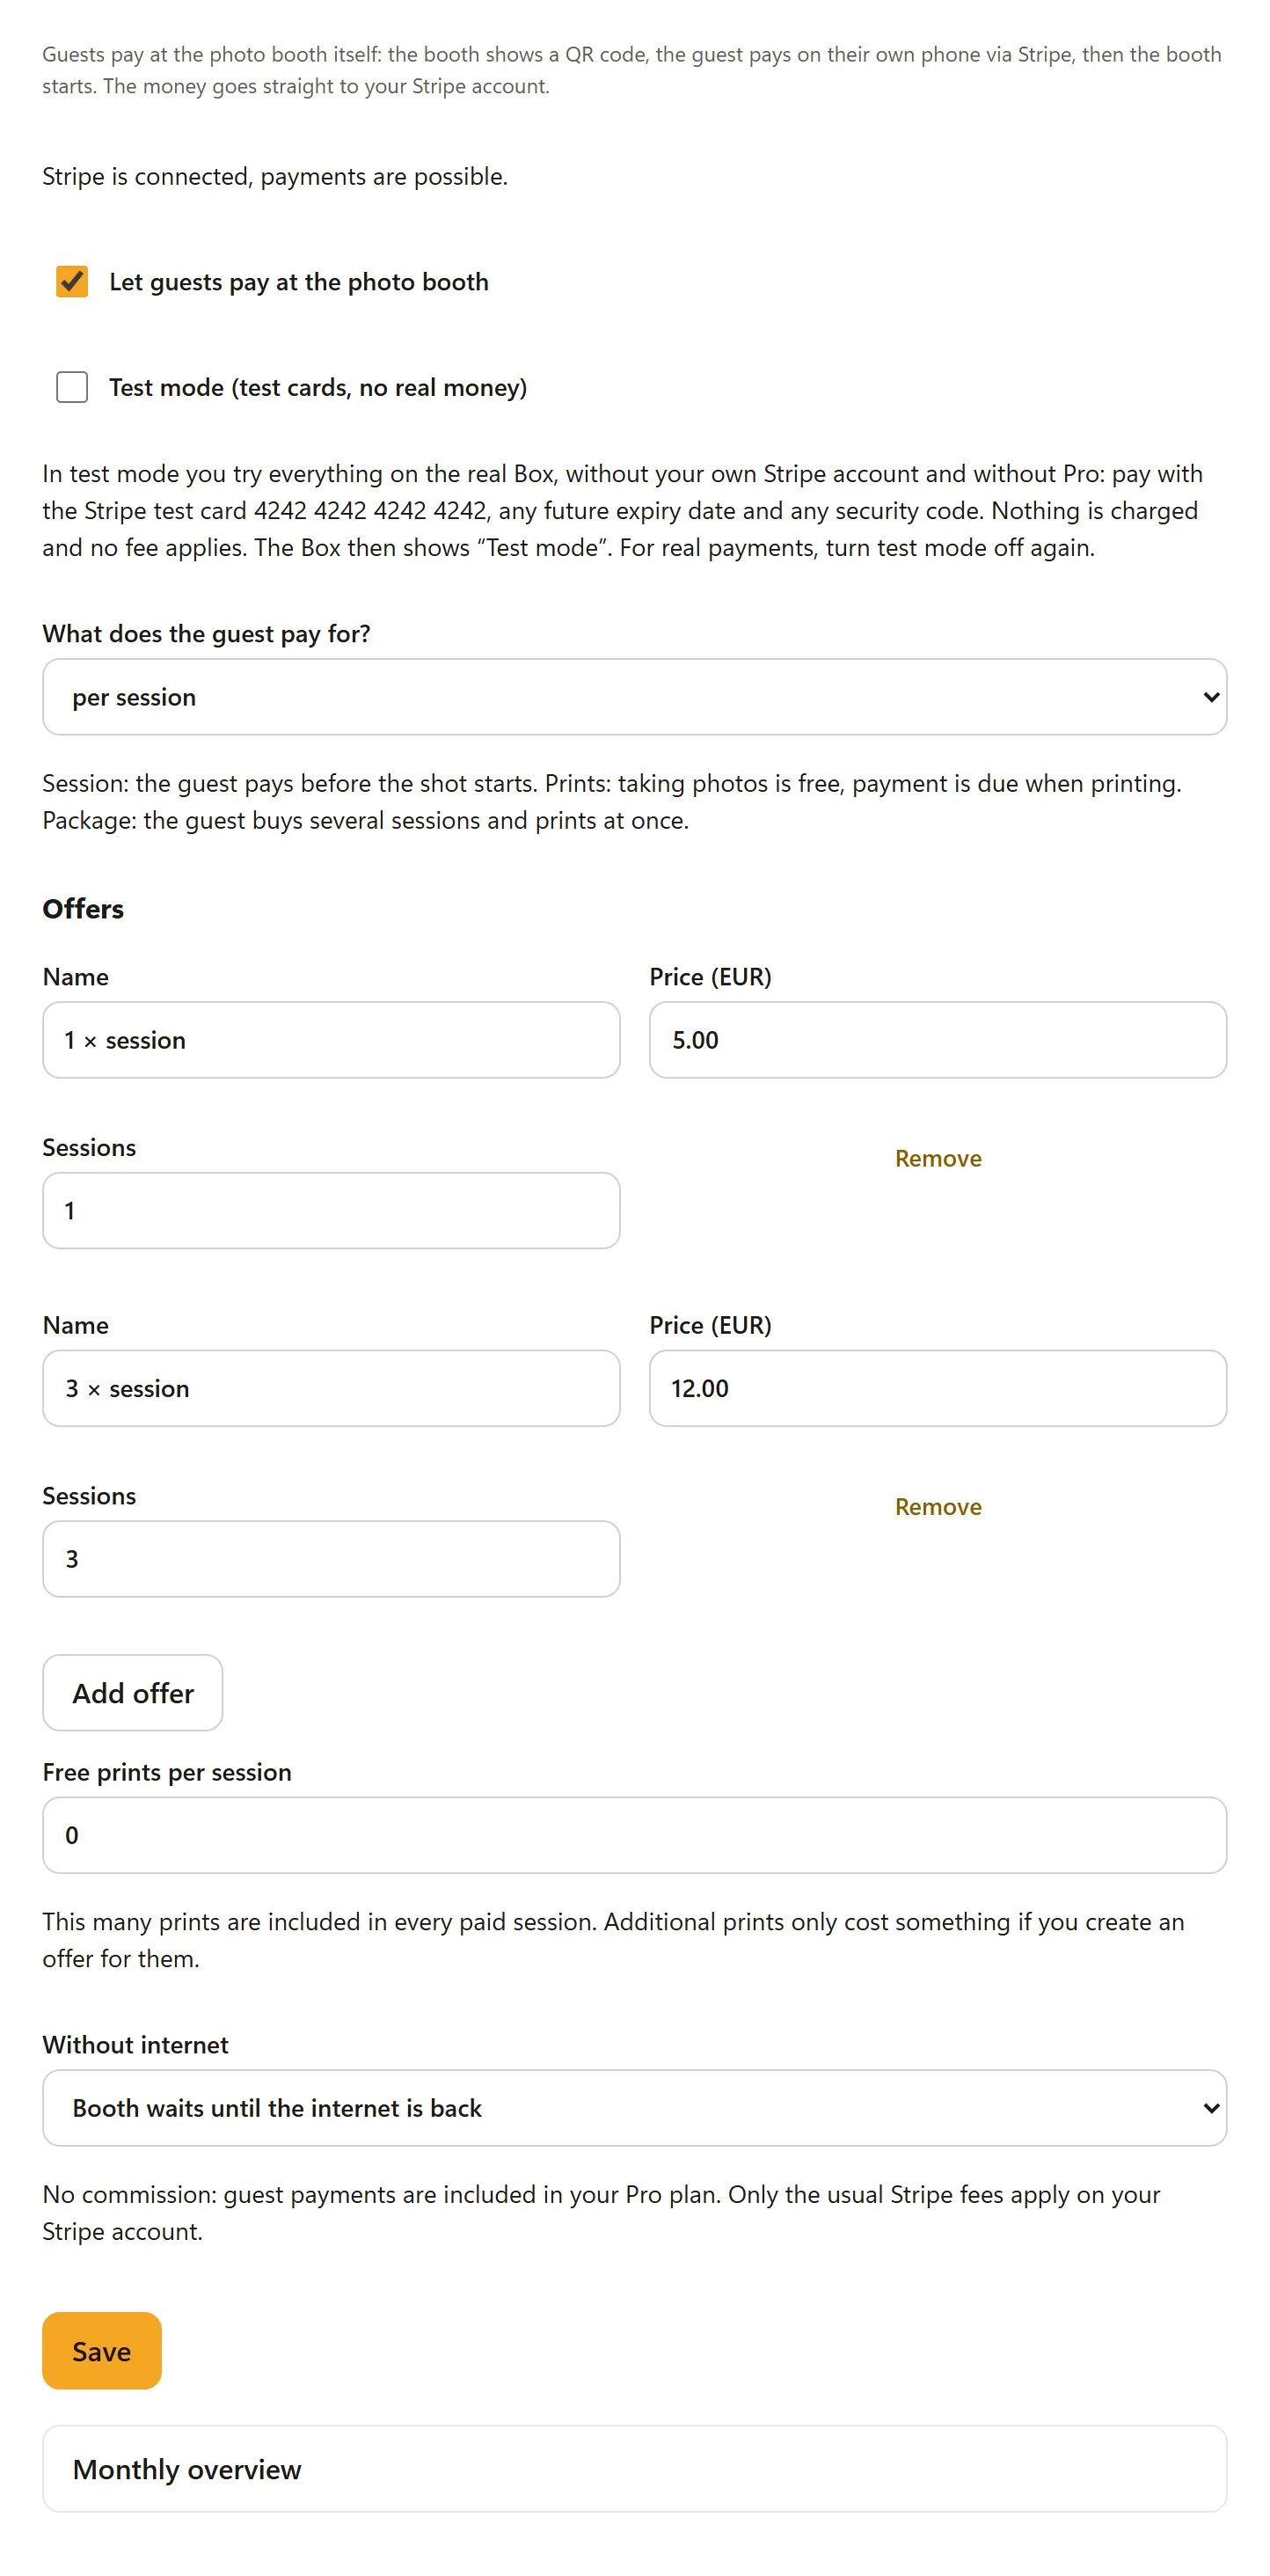
With Guest payments your guests pay directly at the photo booth – per session, per print or as a package. The box shows a QR code, the guest pays on their own phone via Stripe, and the box keeps running straight away. You don't need a card reader. The money goes directly to your Stripe account; BoothDock takes no commission.
Requirements
- an account with Pro (setting it up also works without, switching it on only with Pro),
- your own Stripe account, which you connect in the Hub,
- BoothDock Studio 1.5.12 or later on the box – on Windows, on iPad/iPhone and on Mac,
- an internet connection at the box for as long as guests are to pay.
The account owner and administrators can set it up.
Connect Stripe
- In the Hub, under Events, open your event and the Guest payments tab.
- Click Connect with Stripe. Stripe asks for your company and bank details – this is a contract between you and Stripe.
- You then come back to the tab. If it says “Stripe is connected, payments are possible.”, you're done. If Stripe still needs details, continue with Continue setup at Stripe; Check status fetches the current status.
The Stripe account applies to your entire BoothDock account and all events. If you have already connected Stripe in the booking module, it is the same account. A new Stripe account is created for the country set in the booking module – without the booking module, for Germany.
Set up guest payments
Under What does the guest pay for?, choose a type:
- per session – the guest pays before the capture starts.
- for prints – taking photos is free, payment is made when printing.
- for a package (sessions and prints) – the guest buys several sessions and prints at once.
- Under Offers, use Add offer to create up to 6 offers. Each has a Name, a Price (0.50 to 1,000) and the number of Sessions and/or Prints – for example “1 session” for €5 and “3 sessions” for €12.
- For prints and packages, set under Free prints per session how many prints are possible without paying (0 to 10).
- Under Without internet, choose what the box does without a connection: Booth waits until the internet is back (default) or Booth keeps running for free.
- Tick Let guests pay at the photo booth and tap Save. When switching it on for the first time, you confirm once that you have read the terms for guest payments (Terms, Part F).
The event's boxes pick up the setting right away. Without an offer, payment stays off. The prices are final prices, as the guest sees them at the box.
Trying it out in test mode
With Test mode (test cards, no real money) you try out the whole process on the real box – even without Pro and without your own Stripe account. Payment is made with the Stripe test card 4242 4242 4242 4242, any expiry date in the future and any security code. Nothing is charged. Meanwhile the box shows a “Test mode” banner.
Switch test mode off again before using the box with real guests. Credit from test payments is only valid at the box as long as the event is in test mode.
How the guest pays at the box
- The guest starts at the box. If there are several offers, they choose one; with only one offer it continues directly.
- The box shows the amount and a large QR code. The guest scans it and pays on their phone on Stripe's payment page. Which payment methods appear there (for example card, Apple Pay or Google Pay) depends on your Stripe account.
- A few seconds after payment the box shows “Thanks! Paid – let’s go.” and starts. The phone shows “Paid – the photo booth is starting”.
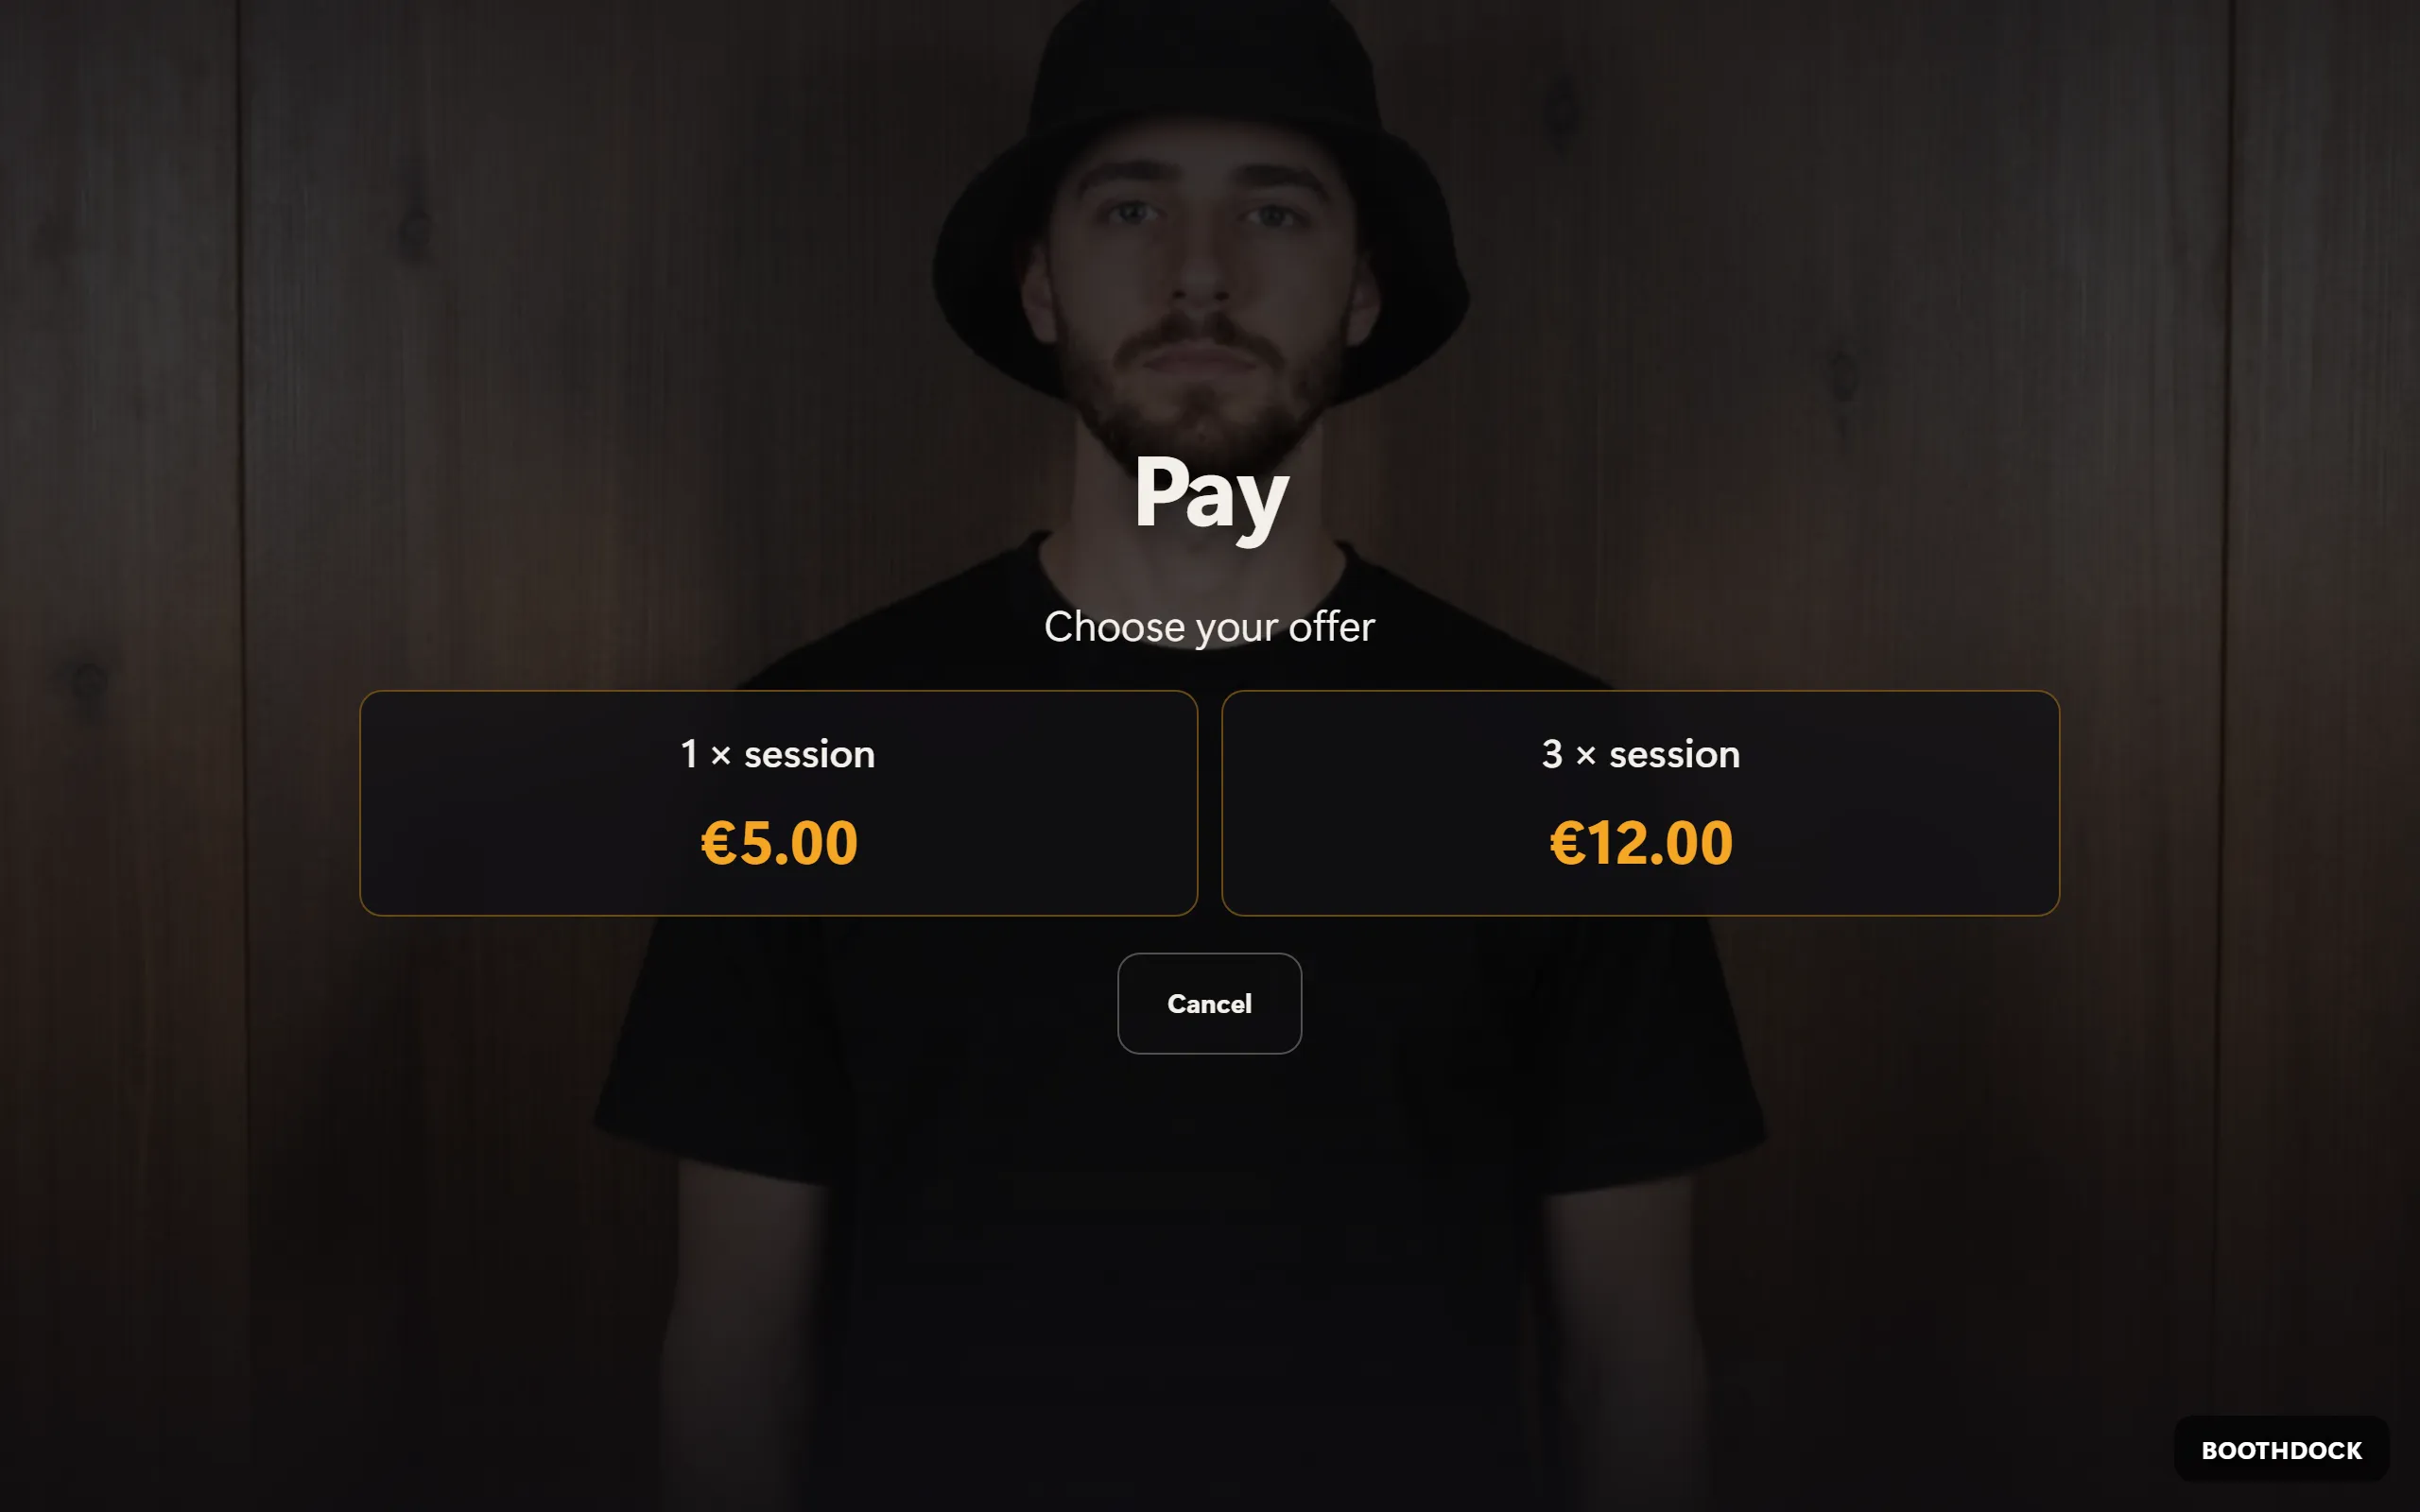
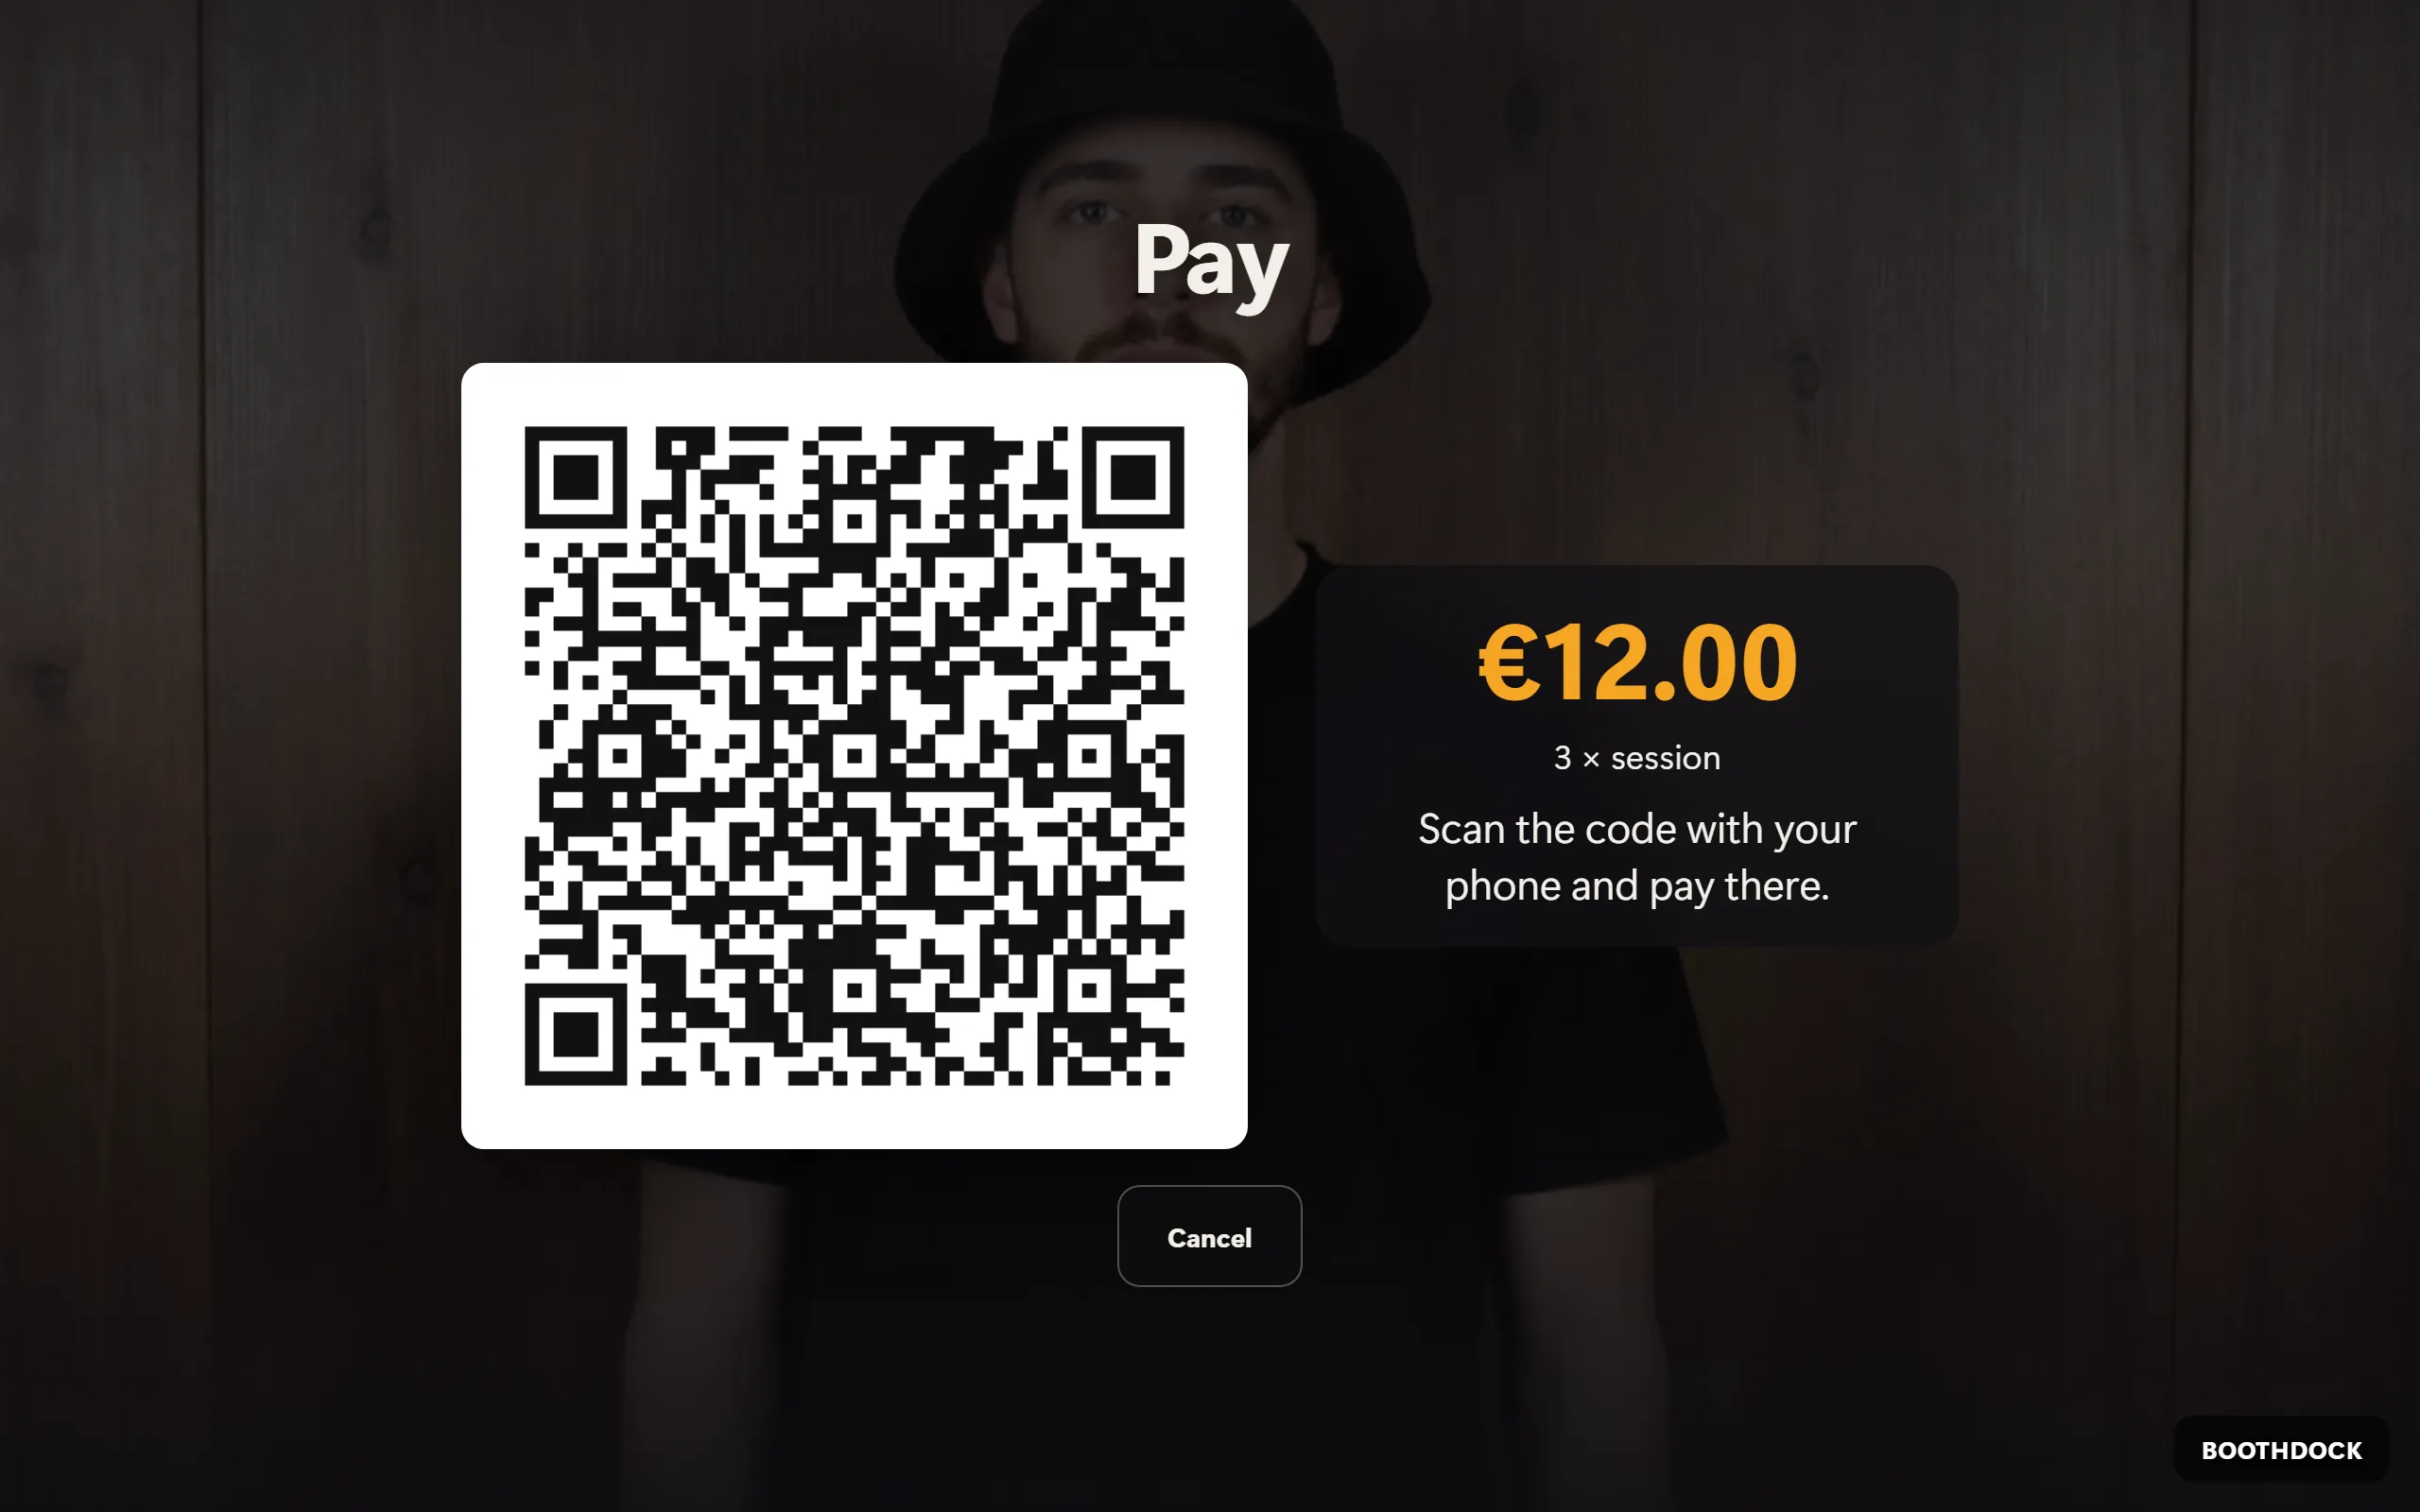
The guest has 3 minutes; the box shows the remaining seconds. With Cancel or when the time runs out, the box closes the payment and goes back to the start.
- Packages and multiple sessions: Whatever isn't used right away remains as credit at this box – the next sessions run without paying again.
- Prints: If the free prints are used up and there is no print credit left, the box opens the Pay for more prints step before printing. If printing goes through a BoothDock Station, the station shows a notice, and payment is made on the photo booth's screen.
- Without internet the box waits with the notice “Payment isn’t possible right now …” or keeps running for free – depending on your setting.
In BoothDock Studio you see the status under System → Operation in the Guest payments section, along with this box's open credit. Settings are made only in the Hub.
Payments, payouts and refunds
- Monthly overview: At the bottom of the Guest payments tab you see all guest payments of your account in the selected month, across all events – with time, event, amount and status (paid, open, cancelled, expired). Test payments are marked and don't count towards the total.
- Payout: The money sits in your Stripe account. Stripe deducts its fees from each payment and pays out to your bank account according to your payout schedule at Stripe. BoothDock charges no fee of its own.
- Refund: You make refunds in your Stripe Dashboard on the payment in question. In the Hub the payment remains listed as paid.
Legal: you are the seller
The contract for the paid session or print is concluded between the guest and you. BoothDock is only your technical service provider and not the seller. This makes you responsible for prices and price information, mandatory information for the guest, invoices and receipts, refunds and complaints, and the taxation of your income. The details are in Part F of the Terms. If in doubt, clarify questions about tax and price information with your tax advisor.
Frequently asked questions
Does this cost extra? No. Guest payments are included in Pro; only the usual Stripe fees apply on your Stripe account.
Does the box need its own hardware? No. The guest pays with their own phone; the box only needs internet.
What about the rental time? Extending the rental time at the box uses the same checkout and the same Stripe account, as soon as the Rental time at the booth card appears in the Details tab – see End of rental time and extending at the box.
See also: Create an event, Printing – formats, printers and limits, Plans, billing and team – Free, Pro, Pro trial.